Martin Lawrence Photography
How to create a panorama in Photoshop - Shooting your images
Posted on 20th March, 2018
Introduction
This is the first part of two articles explaining How to create a panorama in Photoshop - Shooting your images.
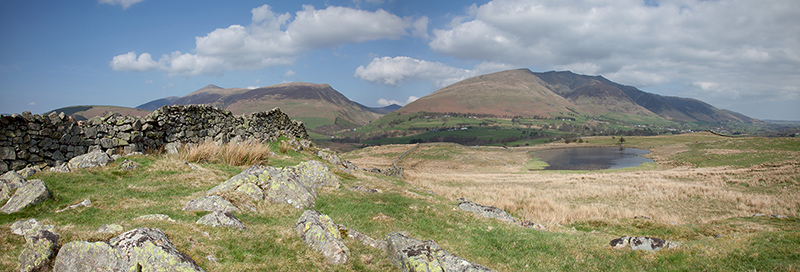
Image 1: Finished Panoramic Image

It is not possible to take a panoramic image with your digital camera. The two most common options used to produce such an image are:-
OPTION 1: Shoot the whole scene with a view to cropping it later to end up with a long thin panoramic image or
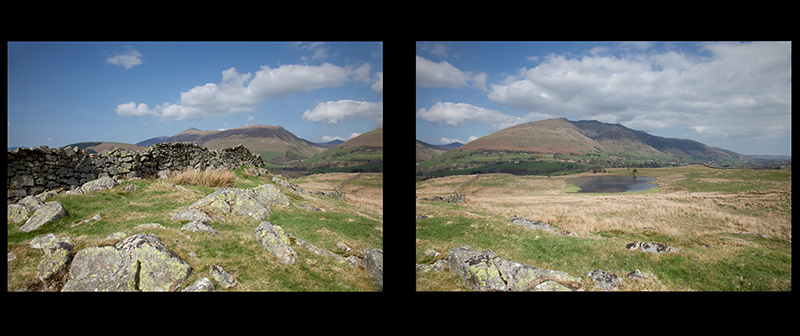
OPTION 2: Shoot several overlapping images which can be stitched together later using software which has been specifically designed for the purpose such as Photoshop’s Photomerge utility.
When I first started producing panoramic images I used Option 1 mostly and I find that this can still be useful when, due to rapidly changing light conditions, speed is of the essence and there is only time for that one killer shot. However, cropping a single image in this way is not using your camera to its best advantage, as you are theoretically cropping out half the number of pixels from your finished image. Option 2 is much the method to be preferred as the end result will give you a panorama with two or three times the number of pixels giving the resultant image a greater resolution. This is the method which I am going to describe for you.
In the first part of this article, I am going to describe some of the factors that you need to take into consideration when shooting your images to ensure that you get the best possible chance of obtaining a good result when you come to merge them later to form your panoramic image.
Your checklist
1. Whilst you can manage without one by remaining standing firmly in the same spot and not moving around, it is much better to use a sturdy tripod.
2. Make sure that you keep the camera level. Some tripods include bubble spirit levels or have a hot shoe where you can attach one that will help you keep the camera on an even keel.
3. Take each shot with the same camera-to-subject distance and camera height. Otherwise, you end up with different subject image sizes that won’t line up properly. Ideally, you should use a tripod with a head that pans.
4. Maintain an axis of rotation i.e. don’t allow your camera to dip slightly up or down. Again, for best results, use a tripod.
5. Make sure that you overlap each shot by at least 10 percent so that Photoshop has enough detail to compare your images when it tries to stitch them together. If you’re shooting with a wide angle or fisheye lens where a lot of geometric distortion occurs in the images, you’ll want to double or even triple that amount since Photoshop will need much more information to work with. Some cameras provide a panorama mode that displays a portion of the previous shot in the LCD monitor so that you can see where to align the next shot in the series.

6. Use a consistent focusing approach. If you lock the focus on the foreground in one shot, don’t focus on the background in the next shot. You’ll need to lock in your exposure, focus and focal length so they remain constant in each of your shots
7. Avoid including moving objects such as sheep and people in your shots or you may end up with the same object appearing in several places in the stitched panorama.
8. To avoid any confusion, one tip that I find useful is to take a shot of my hand with the number of fingers sticking up that is equivalent to the number of following images that go together to make up my panorama.
9. You need to keep in mind that the more images that you are stitching together, the more memory Photoshop will require to process them since it needs to open all the images at once. If your DSLR shoots massive files at 480dpi like my Canon 5D Mark III does, it may be a good idea to save smaller versions of them first and work with those, or you may risk Photoshop slowing down to a crawl or maybe even running out of memory before the process is complete
In the next part of the article, I will show you how to use Photoshop’s Photomerge facility to produce your panoramic image. Whilst not guaranteed, if you have followed all the items in the above Checklist, you should have a good chance of success.
CONCLUSION
If you have any comments or questions on this tutorial don't hesitate to Contact me.
Why not join me or one of my 1-2-1 or small group workshops or, if you want specific Photoshop training, check out my 1-2-1 Adobe CC Photoshop Tuition for Photographers.
© Martin Lawrence Photography 2018
