Martin Lawrence Photography
How to use the Photomerge command to stitch together photos and edit them in Photoshop
Posted on 20th March, 2018
This is the second part of two articles explaining How to use the Photomerge command to stitch together photos and edit them in Photoshop
Image 1: Finished panoramic image
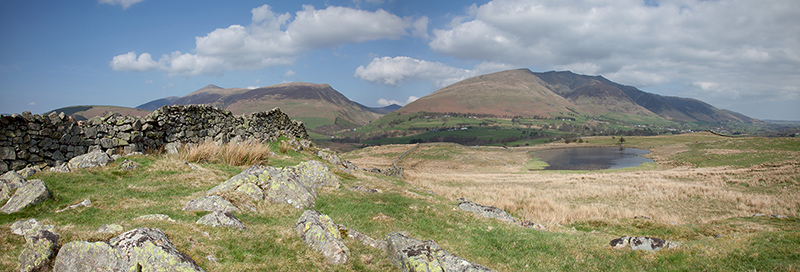
Introduction
In the second part of this article, I am going to show you how to create a panorama in Photoshop - Using Photomerge to process the individual images that you have taken and stitch them together to form a seamless panoramic composition. Photoshop CC 2018 saw great improvements in the alignment and blending processes within the Photomerge command and, in the majority of cases, the ‘Auto’ layout option is all that is now needed to create a great panoramic image.
Preparing your images
Photomerge can now work with RAW files so you no longer need to convert these to JPEG format. If you do not, however, want to stitch in RAW file format but want to use your RAW files, just make sure you do the same changes in the RAW converter on all the files being stitched otherwise you may get unsatisfactory results and all your work following the tips and techniques in Part 1 of this article will have been wasted.
As also mentioned in Part 1, it is recommended when using an older computer, or a computer with less than 1 GB of RAM, that you reduce very large images or Photoshop may disappear off the face of the earth whilst it tries to process these and it may never return again. Once you have made any changes to your images, you can put them into a folder on your Desktop ready for stitching together.
Stitching your images
STEP 1: Call up the Photomerge command
Select Automate—-> Photomerge… from the File menu and the Photomerge dialogue box will appear.
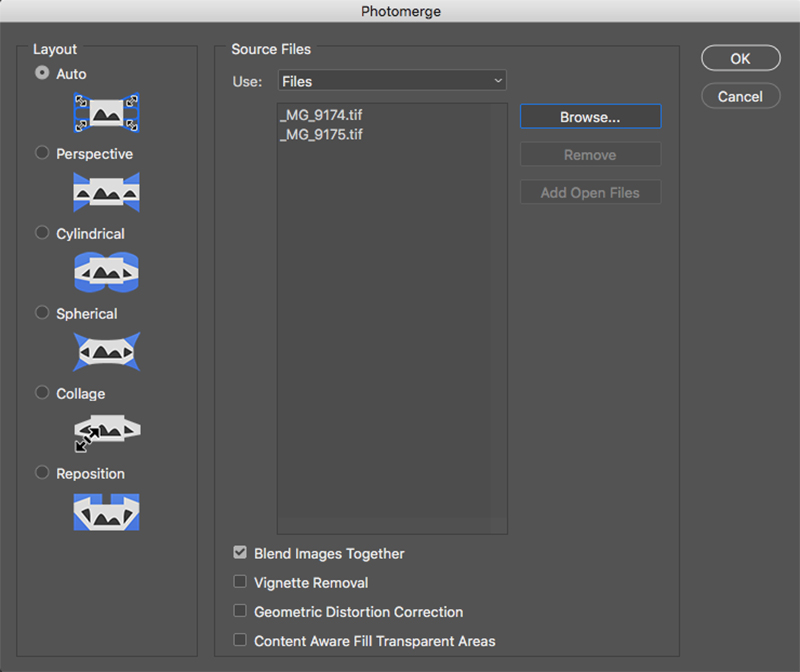
Image 2 : Photomerge dialogue box
Step 2: Select your images in the Photomerge dialogue box
Click on the Browse button, navigate to your folder on the Desktop and select the images you want to use by clicking on the first one and then holding down your Ctrl key and clicking on the others until you have them all selected. Clicking on Open will return you to the Photomerge dialogue box. The selected images will then be shown as source files in the large rectangular box on the screen.
Step 3: Select your Options in the Photomerge dialogue box
Along the left-hand side of the Photomerge dialogue box are the Layout options. These are basically the ways in which the Photomerge utility will try and align your images together. The Auto option is the best one to select and will normally be able to produce your panorama automatically for you. It will create a separate layer for each of the source images, align them, blend the tones and colours between them and then mask each individual layer so that there is no visible overlap showing in the completed panoramic image.
If the Auto option does not give you a good result, you can always undo the command and try again with one of the other options. Occasionally you may need to select either the Perspective or Cylindrical options for very wide panoramas but you will find that Auto will work almost every time.
There are three checkboxes at the bottom of the Photomerge dialogue box:-
- Blend Images Together
- Vignette Removal
- Geometric Distortion Correction.
Blend images Together is automatically checked by default as it tells Photoshop not only to stitch the images together but also to blend their tone and colours. Vignette Removal does exactly what it says on the tin, removing the dark shading that you sometimes get in the corners of an image particularly when using wide angled lenses. Check this only if you have this problem with your images. Geometric Distortion Correction need only be checked if you shot your images using a very wide angle or fish-eye lens which can cause extreme distortion.
I find that I normally check the Blend Images Together box only.
Step 4: Run the Photomerge command
Once you have all your options selected, click the OK button in the top right corner to exit out of the Photomerge dialog box and run the command.
You will then need to sit and wait patiently whilst the Progress dialogue box keeps you informed of Photoshop’s attempts to align and blend the layers to create a seamless composition. Finally your stitched panorama will appear on the screen and, hopefully, you will be very impressed with the outcome. It looks a bit of a weird shape at the moment, but we will tidy that up.
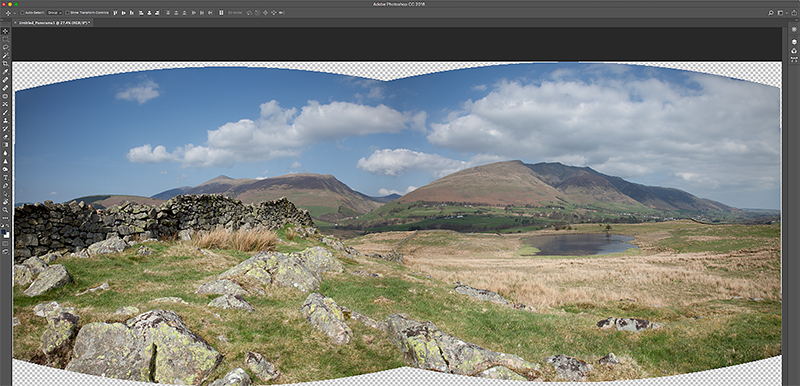
Image 3 : Panoramic image after Photomerge command completed
If you look in your Layers palette, you will see each of your images in its own separate layer each with its own layer mask created automatically by Photoshop when aligning the images:
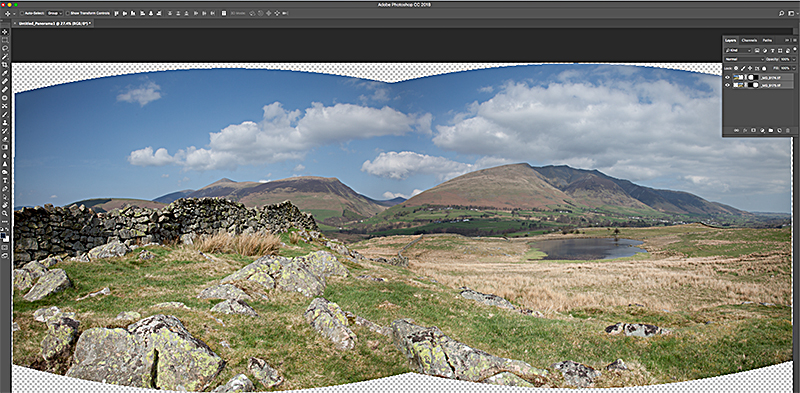
Image 4: Layers palette after Photomerge completed
Step 5: Tidy up your panoramic image
You now just need to crop away any unwanted areas using the Crop Tool so select it from the Tools palette and drag out a rectangle around the area that you want to retain. When you are happy with your selection press Enter and that’s it done. The last job is to flatten your image by selecting Flatten Image from the Layers menu. Make sure that if you decide to reduce the size of your image that you do so after you have flattened it and not before or you will probably encounter hairline cracks appearing in it.
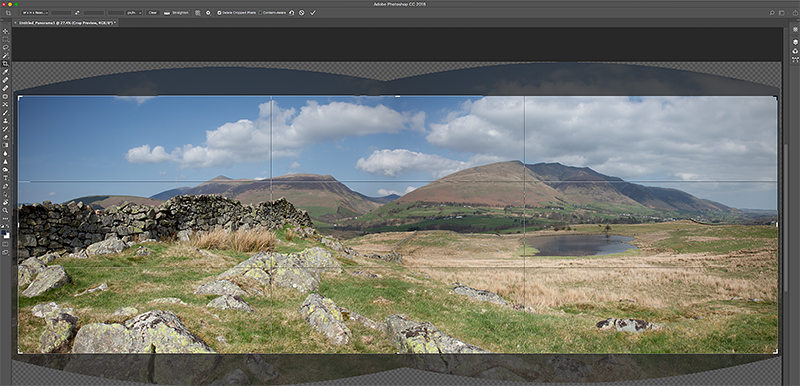
Image 5 : Cropping your merged panoramic image
CONCLUSION
If you have any comments or questions on this tutorial don't hesitate to Contact me.
Why not join me or one of my 1-2-1 or small group workshops or, if you want specific Photoshop training, check out my 1-2-1 Adobe CC Photoshop Tuition for Photographers.
© Martin Lawrence Photography 2018
